Create a workspace
Before you start working in Fabric, you need a container for storing various Fabric items. This container is called a workspace. Let’s create one that we will use for all of our labs.
- Navigate to the Microsoft Fabric home page at https://app.fabric.microsoft.com/home?experience=fabric in a browser, and sign in with your Fabric credentials.
- In the menu bar on the left, select Workspaces (the icon looks similar to 🗇).
- Create a new workspace and name it: “Fabric Bootcamp”, selecting a licensing mode in the Advanced section that includes Fabric capacity (Trial, Premium, or Fabric).
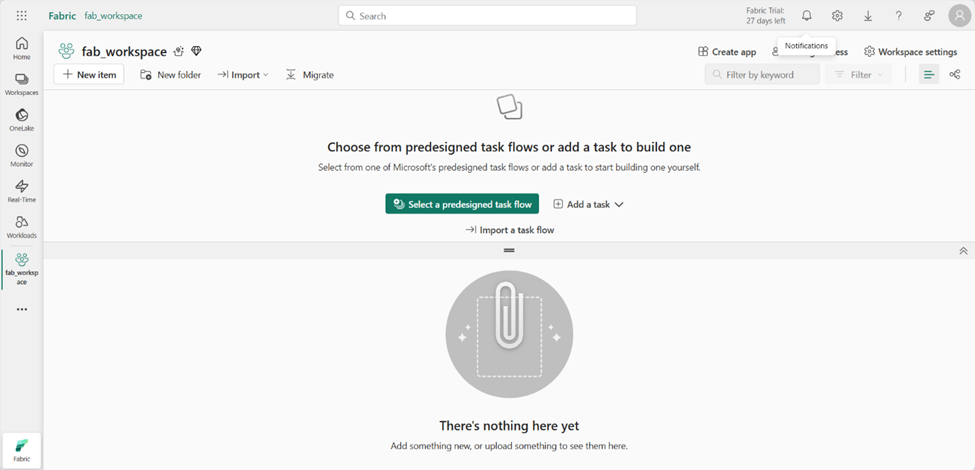
- When your new workspace opens, it should be empty.
Create a lakehouse
Now that you have a workspace, it’s time to create a data lakehouse for your data files.
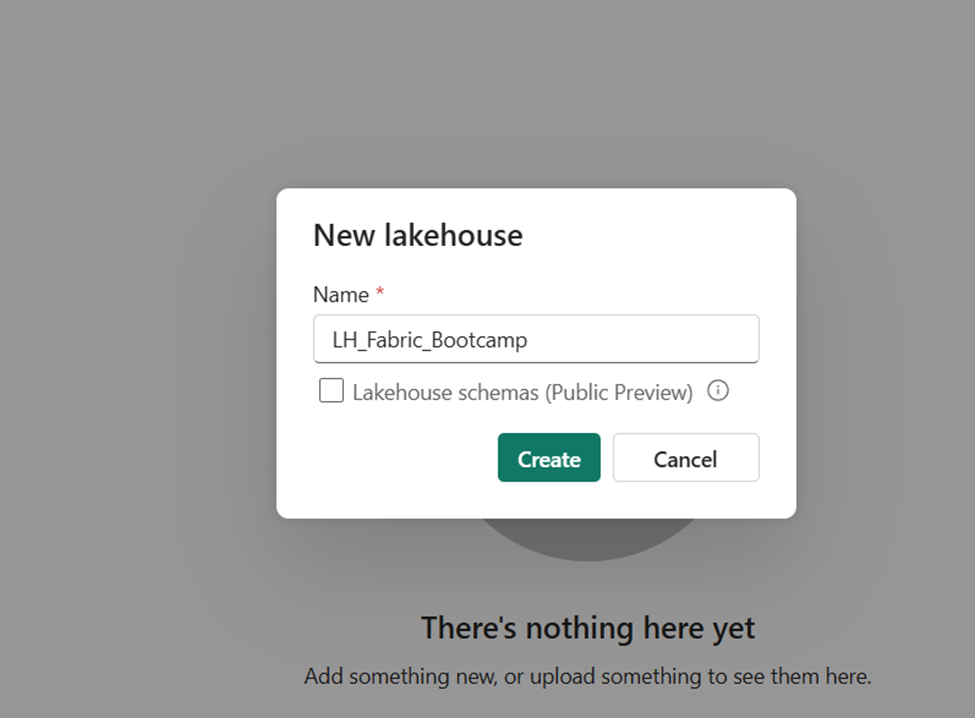
- In the top left corner, select New item. In the New item window, under the Store data section, select Lakehouse. Give it a name: LH_Fabric_Bootcamp. Leave the option Lakehouse schemas unchecked
After a minute or so, a new lakehouse will be created.
- View the new lakehouse, and note that the Lakehouse explorer pane on the left enables you to browse tables and files in the lakehouse:
- The Tables folder is the are of the lakehouse managed by Spark. It contains tables that you can query using SQL. Tables in a Microsoft Fabric lakehouse are based on the open-source Delta Lake file format, commonly used in Apache Spark.
- The Files folder is the unmanaged area of the lakehouse and contains data files in the OneLake. You can store any file format in the Files area (images, videos, JSON files, etc..
Currently, there are no tables or files in the lakehouse.
Upload a file
Fabric provides multiple ways to load data into the lakehouse, including built-in support for pipelines that copy data from external sources and dataflows (Gen2) that you can define using visual tools based on Power Query. However, in this step, we will use the simplest way to ingest the data, by uploading files or folders from the local computer.
- Download the sales.csv file from https://raw.githubusercontent.com/MicrosoftLearning/dp-data/main/sales.csv and save it as sales.csv on your local computer
Note: To download the file, open a new tab in the browser and paste in the URL. Right-click anywhere on the page containing the data and select Save as to save the page as a CSV file.
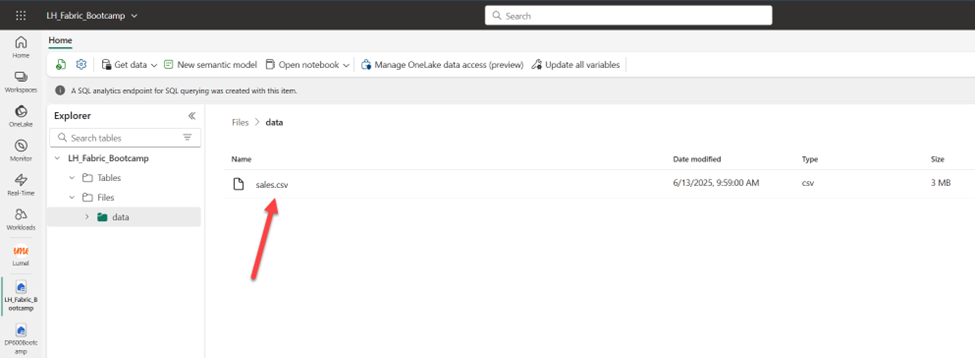
- Return to the web browser tab containing your lakehouse, and in the … menu for the Files folder in the Lakehouse explorer pane, select New subfolder, and create a subfolder named data.
- In the … menu for the new data folder, select Upload and Upload files, and then upload the sales.csv file from your local computer
- After the file has been uploaded, select the Files/data folder and verify that the sales.csv file has been uploaded, as shown here:
Explore shortcuts
In many scenarios, the data you need to work with in your lakehouse may be stored in some other location. While there are many ways to ingest data into the OneLake storage for your lakehouse, another option is to create a shortcut. Shortcuts enable you to include data stored outside of the lakehouse, in a different internal (OneLake) or external storage location, without physically moving the data from its original source.
- In the … menu for the Files folder, select New shortcut.
- View the available data source types for shortcuts. Then close the New shortcut dialog box without creating a shortcut.
Load file data into a table
The sales data you uploaded is in a file that data analysts and engineers can work with directly by using Apache Spark code. However, in many scenarios, you may want to load the data from the file into a table so that you can query it using SQL.
- On the Home page, select the Files/Data folder so you can see the sales.csv file it contains.
- In the … menu for the sales.csv file, select Load to Tables > New table.
- In Load to table dialog box, set the table name to sales and choose csv as the File type. Leave the Use header for column names option checked, and confirm that the comma is selected as a separator
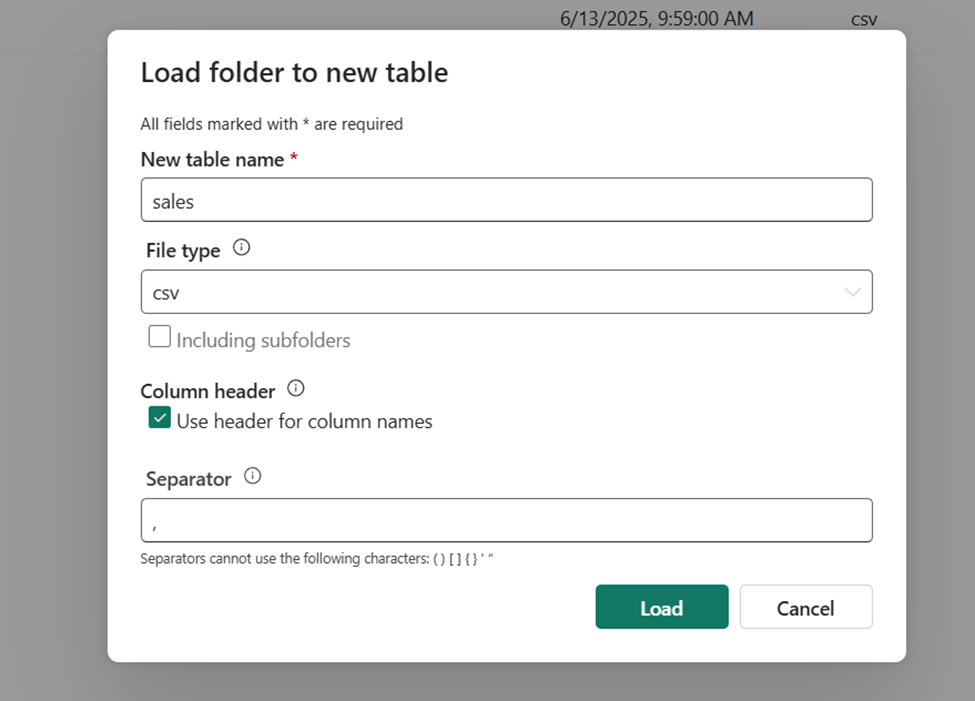
- Confirm the load operation. Then wait for the table to be created and loaded.
Tip: If the sales table does not automatically appear, in the Tables folder, click on three dots next to the Tables folder and select Refresh
- In the Lakehouse explorer pane, select the sales table that has been created to view the data.
- In the … menu for the sales table, select View files to see the underlying files for this table

Files for a delta table are stored in Parquet format, and include a subfolder named _delta_log in which details of transactions applied to the table are logged.
Congratulations! You’ve just built your first lakehouse in Microsoft Fabric and successfully loaded the initial data. Keep up the great work!