Create a Direct Lake semantic model from the Web UI
- In the workspace home page, in the top left corner, select New item and select Warehouse. Give it a name: DWH_Direct Lake.
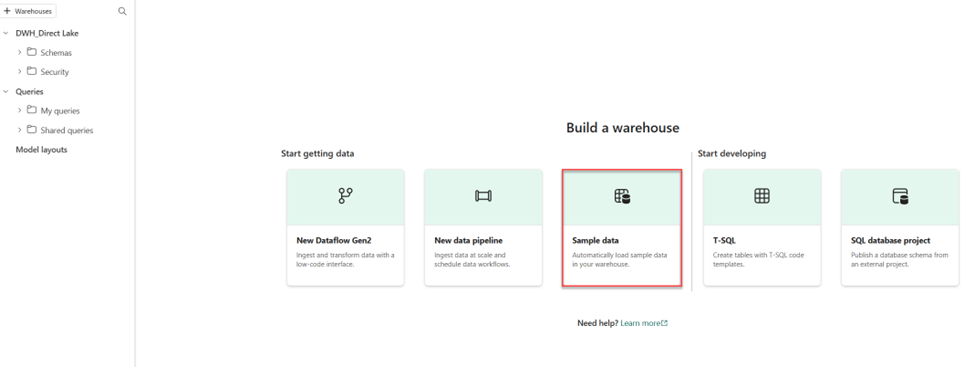
- In the center of the data warehouse user interface, you’ll see a few different ways to load data into your warehouse. Select Sample data to load NYC Taxi data into your data warehouse. This will take a couple of minutes.
- After your sample data has loaded, use the Explorer pane on the left to see what tables and views already exist in the sample data warehouse.
- Select the Reporting tab of the ribbon and choose New semantic model. This enables you to create a new semantic model using only specific tables and views from your data warehouse, allowing data teams and the business users to build reports.
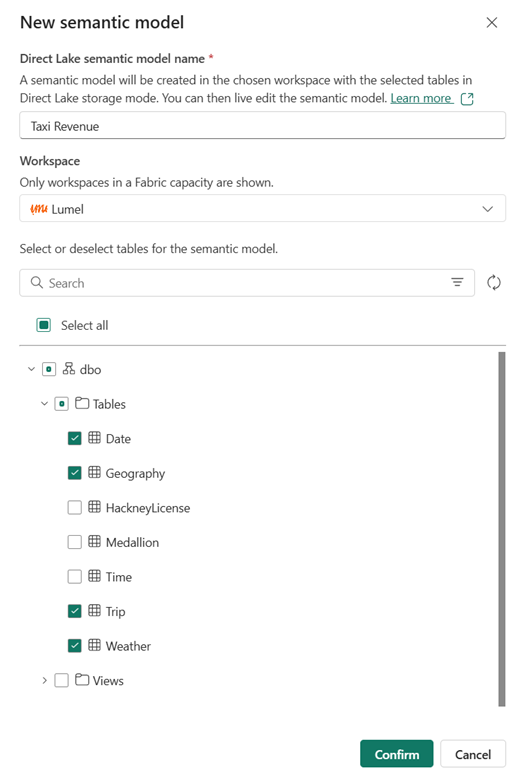
- Name the semantic model Taxi Revenue, ensure it’s in the workspace you just created, and select the following tables:
- Date
- Trip
- Geography
- Weather
Create relationships between tables
Now you’ll create relationships between the tables to accurately analyze and visualize your data. If you’re familiar with creating relationships in Power BI desktop, this will look familiar.
- Navigate back to your workspace and confirm that you see your new semantic model, Taxi Revenue. Notice that the item type is Semantic model, as opposed to the Semantic model (default) that is automatically created when you create a data warehouse.
Note: A default semantic model is created automatically when you create a Warehouse or SQL analytics endpoint in Microsoft Fabric, and it inherits the business logic from the parent Lakehouse or Warehouse. A semantic model that you create yourself, as we’ve done here, is a custom model that you can design and modify according to your specific needs and preferences. You can create a custom semantic model by using Power BI Desktop, Power BI service, or other tools that connect to Microsoft Fabric.
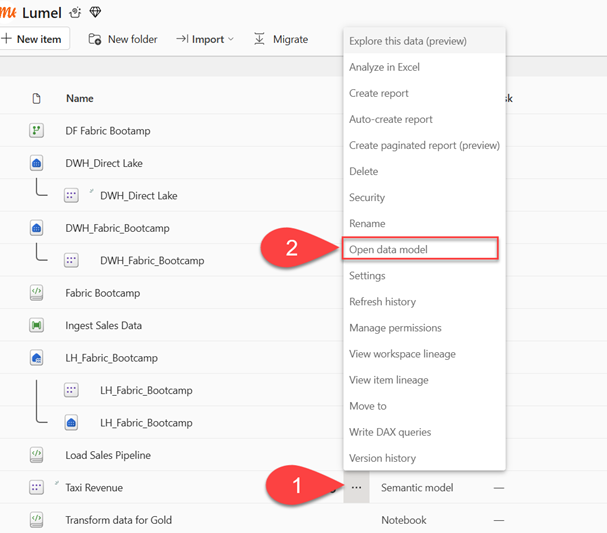
- In the workspace, click on the three dots next to the Taxi Revenue semantic model and select Open data model.
Following the star schema guidelines, we’ll organize the tables in our model into a Fact table and Dimension tables. In this model, the Trip table is our fact table, and our dimensions are Date, Geography, and Weather.
- Create a relationship between the Date table and the Trip table using the DateID column.
- Select the DateID column in the Date table and drag and drop it on top of the DateID column in the Trip table.
- Ensure the relationship is a one-to-many relationship from the Date table to the Trip table.
- Create two more relationships to the Trip fact table as follows:
- Geography [GeographyID] to Trip [DropoffGeographyID] (1:M)
- Weather [GeographyID] to Trip [DropoffGeographyID] (1:M)
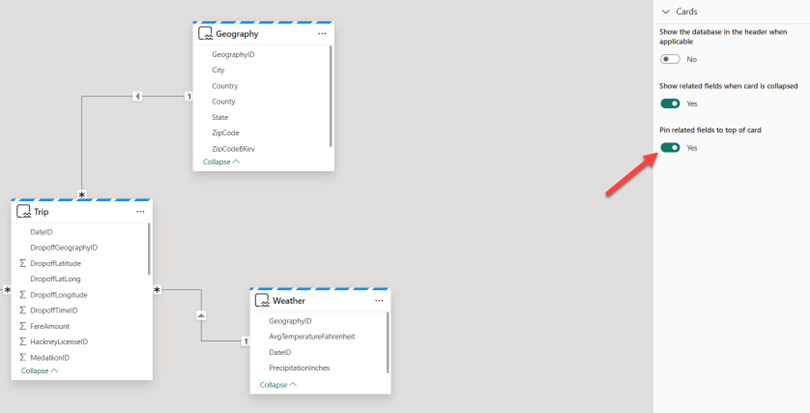
Once done, your model should like something like this:
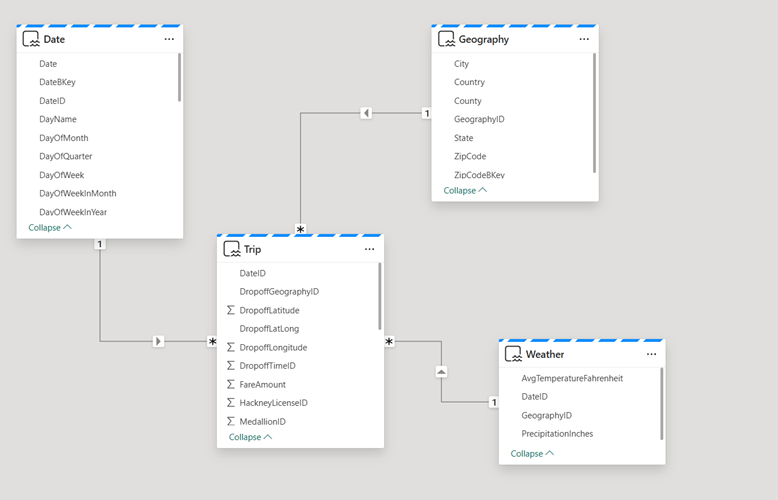
The creation of the star schema model is now complete. There are many modeling configurations that could now be applied, like adding hierarchies, calculations, and setting properties like column visibility.
Tip: In the Properties pane of the window, toggle Pin related fields to top of card to Yes. This will help you (and others using this model for creating reports) see which fields are being used in relationships at a glance. You can also interact with the fields in your tables using the properties pane. For example, if you want to confirm data types are set properly, you can select a field and review the format in the properties pane.
Create Direct Lake semantic model from Power BI Desktop
In the previous part of the lab, we’ve been creating a Direct Lake on SQL semantic model. You’ll now learn how to create a Direct Lake on OneLake semantic model from Power BI Desktop.
Let’s kick it off by exploring the key differences between the two Direct Lake implementation options. First and foremost, when using Direct Lake on OneLake, you are connecting directly to OneLake delta tables, whereas if you choose a SQL flavor, the data is being accessed via the SQL analytics endpoint of the lakehouse or warehouse. This distinction impacts many of the available functionalities of Direct Lake semantic models. Probably the most significant difference is that with Direct Lake on OneLake, a semantic model may contain tables coming from more than a single Fabric item.
Creating a Direct Lake on OneLake semantic model starts by opening the OneLake Catalog from Power BI Desktop and choosing the Fabric item you want to use from the dropdown menu, as displayed in the following illustration:
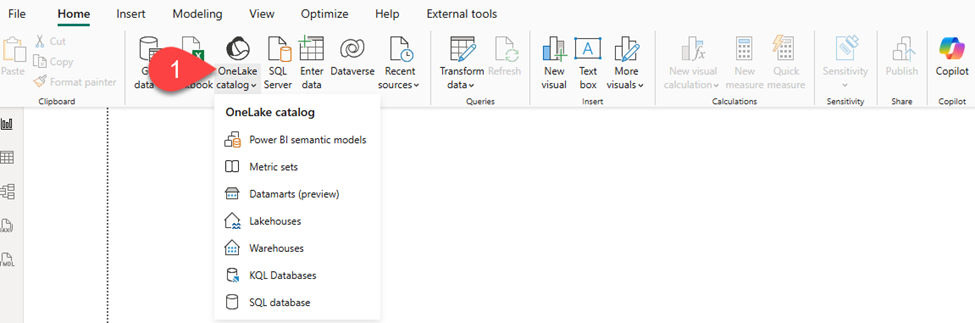
- Click on the arrow to expand the OneLake catalog and select Warehouses from the dropdown menu
The next step is crucial, because it determines if you are going the OneLake or SQL route. The following screenshot illustrates two available options when connecting to the Fabric lakehouse:
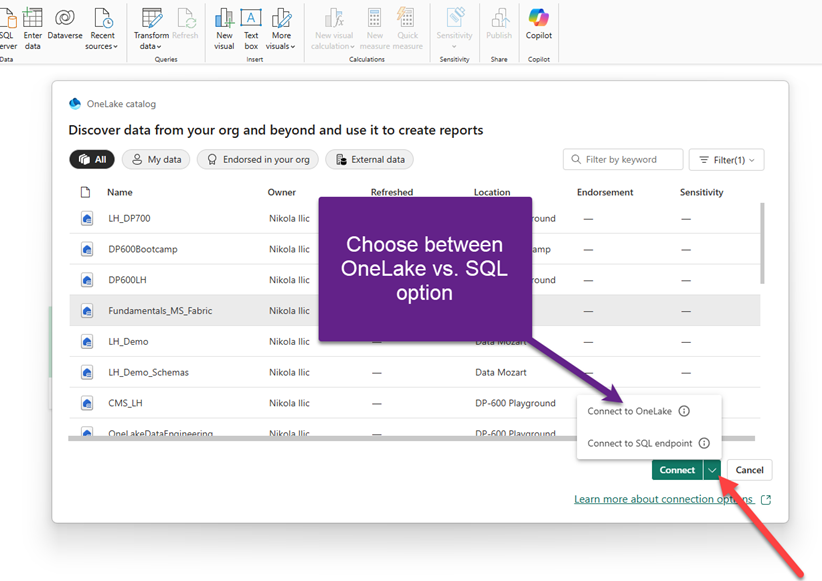
- Click on the arrow next to the Connect button and select Connect to OneLake
- Select the DWH_Direct Lake warehouse
- In the Choose tables from OneLake dialog window, name semantic model: Taxi Revenue OneLake, and pick the following tables from the dbo schema:
- Date
- Geography
- Trip
- Weather
- In Power BI Desktop, create relationships, following the same guidelines as in the previous example:
- Create a relationship between the Date table and the Trip table using the DateID column.
- Select the DateID column in the Date table and drag and drop it on top of the DateID column in the Trip table.
- Ensure the relationship is a one-to-many relationship from the Date table to the Trip table.
- Create two more relationships to the Trip fact table as follows:
- Geography [GeographyID] to Trip [DropoffGeographyID] (1:M)
- Weather [GeographyID] to Trip [DropoffGeographyID] (1:M)
Navigate to the home page of the workspace and notice the Taxi Revenue OneLake semantic model we’ve just created. There is no Publish button, the semantic model is automatically saved in the workspace.
Note: Additionally, please be aware that all changes you apply to the model in the Power BI Desktop are propagated in real time to the model in the workspace – hence, all dependent reports will be automatically updated (or broken, in case of any breaking changes in the model!)
From here, you can build Power BI reports, more or less the same way as we used to in the pre-Fabric era, with Import and DirectQuery semantic models.